Installing an IMS 4.0 gallon tank and Devol radiator guards on the DR-Z400S
I’m writing this up to confirm that I was able to get this combo to work on my DRZ, but it required a bit of experimentation. I think I got an oddball tank that is slightly harder to fit than most of IMS’s tanks. For anyone else pursuing this combo for their bike, good luck and I hope this helps.
Tanks and guards
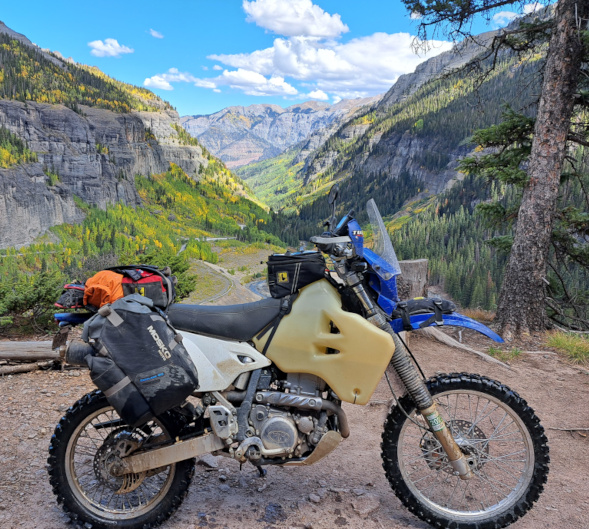
The DRZ’s stock tank (2.6 gallon) leaves some capacity to be desired, so a lot of folks fit an aftermarket tank. The most common tanks I’ve seen are the Clarke 3.9 gallon and the IMS 4.0 gallon. I’ve seen some folks running Safari tanks, which look super nice, but they’re pricey. I don’t really care for the Clarke tank, so I scoured the webs for reviews of the IMS tank. From what I found, it sounds like a few folks have fitment issues with the IMS tank, but most install it a fuss.
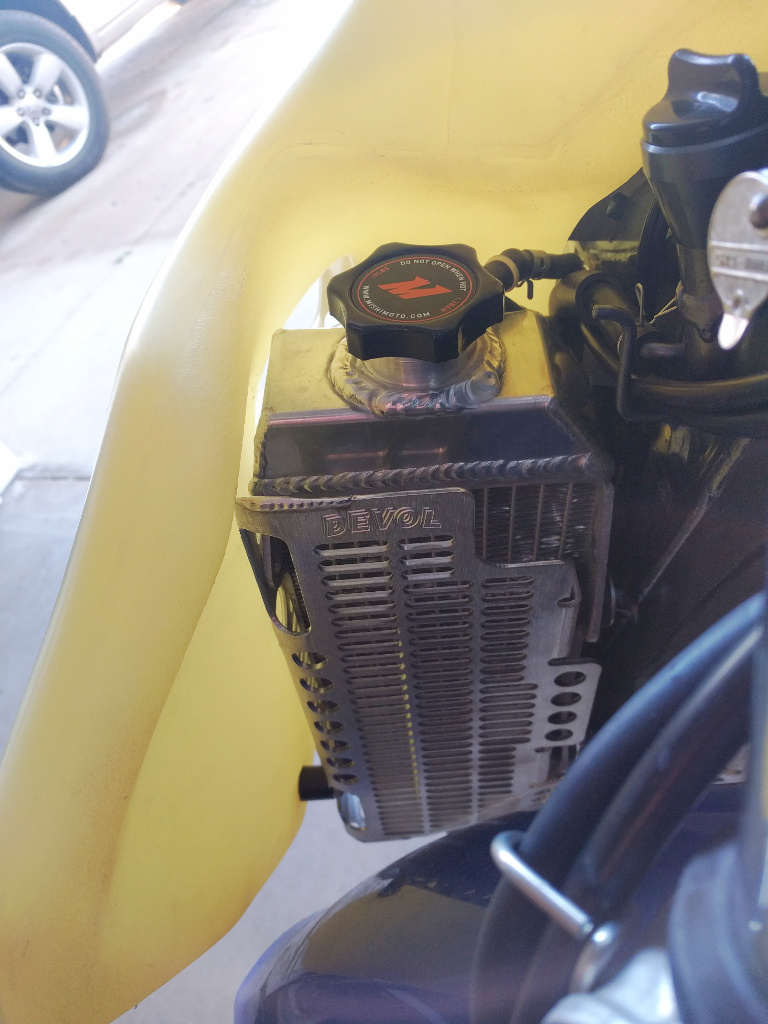
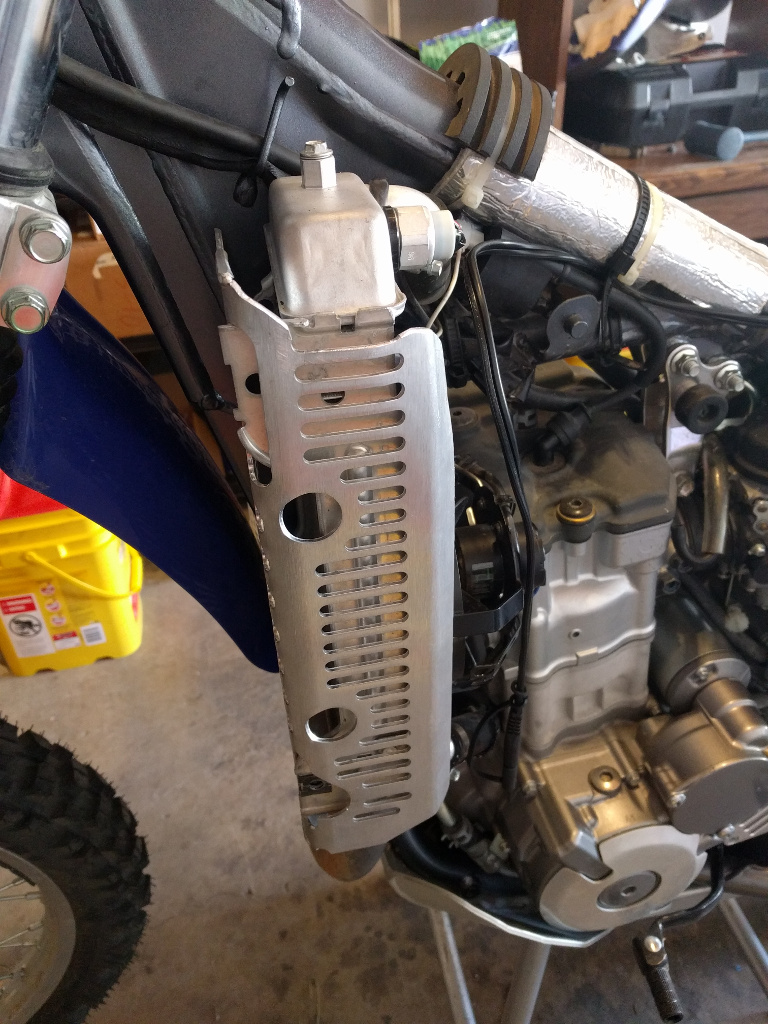
I want to run aftermarket aluminum radiator guards, which adds an additional complication to the fitment of a new tank. Note that since the Clarke tank sits behind the radiators and uses the stock radiator shrouds, any aftermarket radiator guards should work without problems. The Unabiker radiator guards seem the strongest, but I doubt I could get them to work with the IMS tank without major modification. Furthermore, the previous owner broke the OEM right radiator in a crash and replaced it with a Mishimoto X-braced radiator. The Mishimoto radiator is significantly cheaper than an OEM replacement, but is both taller and thicker than the OEM radiator (it also has a few other fitment issues). Due to the way the Unabiker guards fit around the radiator, it seems that the Unabiker guards are out, unless I buy an OEM-sized replacement radiator.
While the Devol radiator guards look like they provide less strength than the Unabiker guards, their wrap-around design should work with my mismatched radiators. And the IMS tank should help to provide enough side protection, at least until I really auger in. Even though he had some fitment issues, this video by ColoradoDualSport gave me hope that I could get the IMS tank to fit with Devol radiator guards.
Fitment of the tank
Well, I was one of the unlucky few who got an IMS tank with some fitment problems. I installed the radiator guards with only slight modification of the right guard (described below) and then worked on fitting the tank. It was pretty much impossible to move the tank forward enough to fit the lower tank mounting bolts. To ameliorate this issue, I expanded the bolt holes on the tank’s lower mounting bracket, allowing the bracket to be pushed forward, leaving the tank in place. This allows the radiators with guards and tank to be mounted well enough, but I then tried to reinstall the seat. Oh boy did that not work: the seat was about 1/2” too far back to install the seat mounting bolts.
I don’t know if the tank’s fitment issues are due to the rubber mounting cushions on the frame, a slightly tighter-than-usual tank, or something else. I do know that it’s not due to the radiators or guards, since the tank was still too far back even with the guards and the radiator mounting bolts removed (so the radiators were hanging by the coolant hoses). Removing the inner rubber mounting cushions did allow the tank to be moved forward enough to mount the seat, so they’re involved in the problem. I believe the issue could be the width of the frame slot in the tank (the gap in the tank where the upper part of the frame sits) or the side of the gaps in the inner side of the tank that engage the rubber mounting cushions.
I don’t recall exactly what I ended up doing to get the tank fitment resolved. I believe it was a combination of the following.
-
Pulling apart the wings of the tank when mounting it. Doing this allowed the wing mounting bolts to line up pretty closely with the corresponding nuts on the radiator.
-
Using a spare combination wrench to gently lever the tank forward when aligning the lower mounting bolts.
-
Removing the rubber cushions from the underside of the seat pan. This allows the seat to move a touch forward, lining up the mounting bolts at the rear of the seat. Note that this allows the plastic seat pan to rub against the plastic gas tank, which is probably acceptable.
With these changes, it is actually not difficult to mount the tank, which gives me confidence it won’t be a problem if when I need to take the tank off on the trail.
Modifications to the guards
I initially saw that some modifications of the right guard was required due to the extended height of the Mishimoto radiator. I ended up removing the top cross piece of the right radiator guard to give room for the top of the radiator, allowing the radiator sit down as far as possible.

I also had to file down the side of the washer on the radiator mounting bolts, as explained in WheeliePete’s review. For the right radiator, I had to file down the radiator side of the washer to give room for the fins, since the mounting hole geometry is slightly different from the OEM radiator.
Once I figured out fitment for the tank (explained above), I noticed that the top of the guards were touching the side of the tank. Fearing the aluminum guards rubbing on the tank, I decided to trim a bit more material away on both the right and left guards.
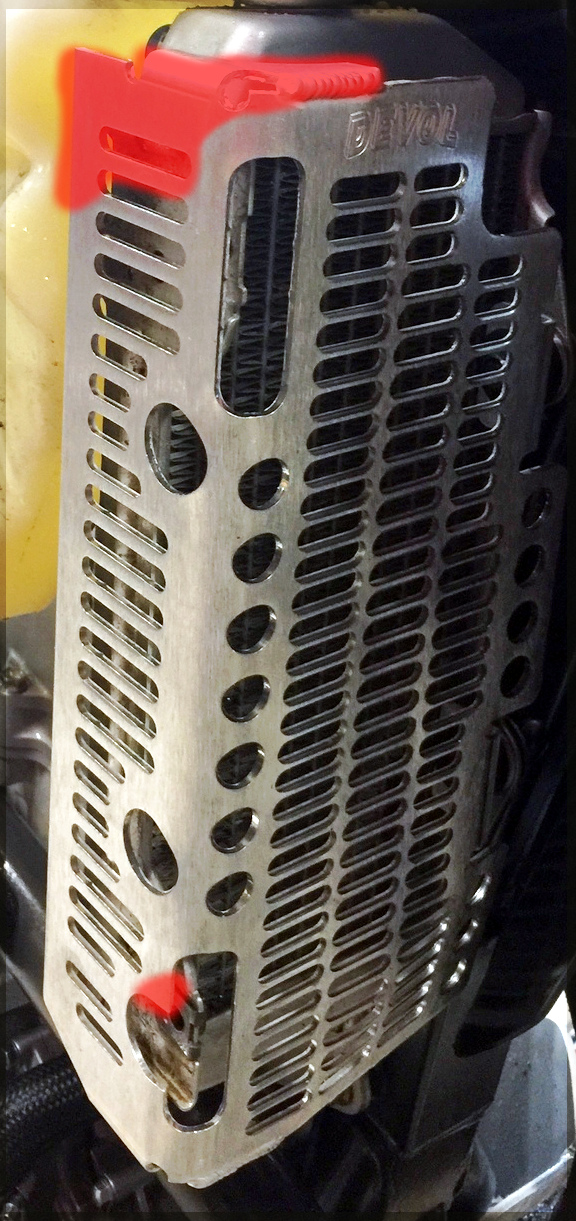
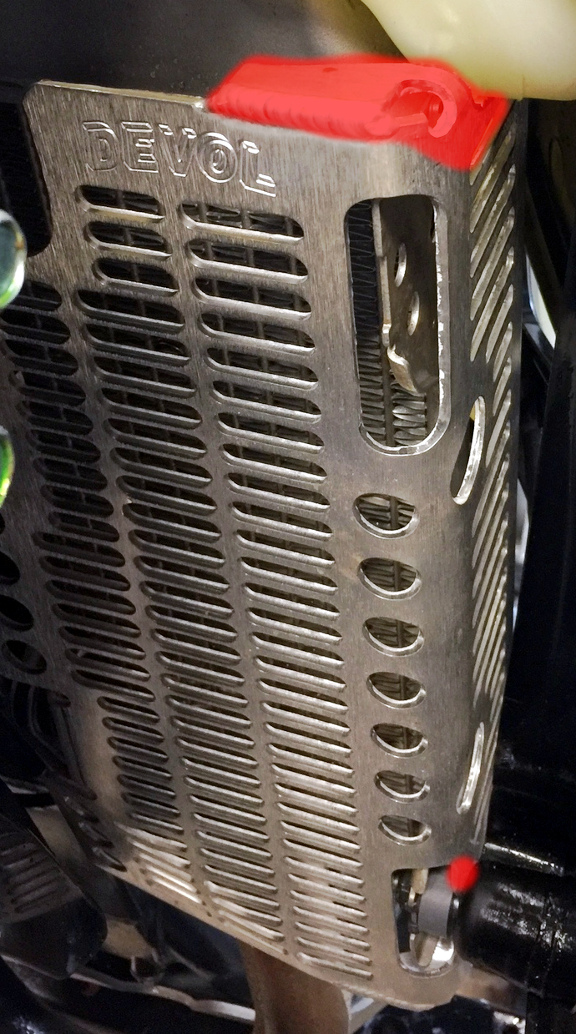
Although not shown, I expanded the mounting hole of both guards to allow the guards to sit down another 1/4”. Together with the trimming, this appears to allow the tank to sit around the guards without rubbing.


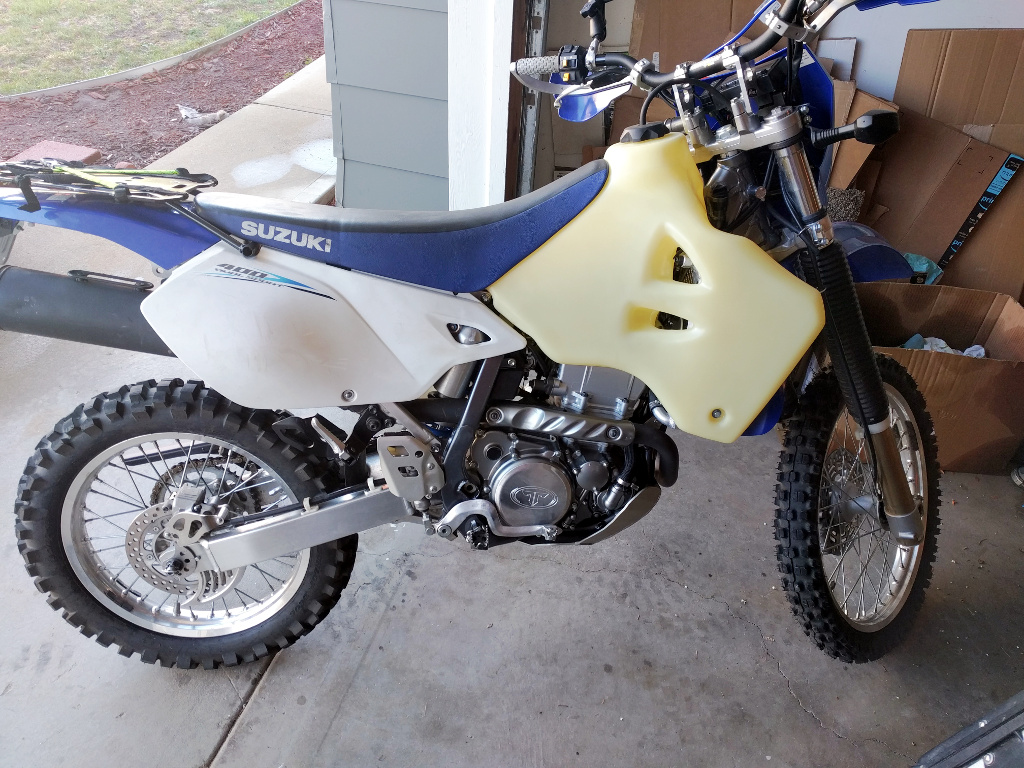
The tank wing mounting bolts lined up easily enough, and everything seems pretty solid.
Fitting this tank and radiator guard combo was a pain in the butt, but I got it to the point where the tank and seat are easily removable and installable. Overall I’m happy with how things turned out; we’ll see how they hold up.
A quick note: when I first filled up this gas tank, I was able to put in around 4.2 gallons. Crudely accounting for the unusable gas in the left wing, this should give me about 4.0 gallons of usable fuel (the fuel in the right wing can be transferred to the left wing by tipping the bike over).
More angles